 |
Another
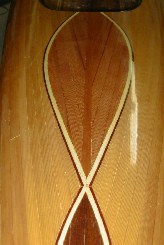
way of doing intricate inlays without spending any time on precise mitering of the strip ends is
using Japanese pull saw.
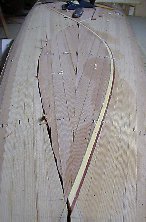
First the curves are laid out with a pencil and a flexible spline (batten) that is stapled to one
side of the centerline. The shape is then transferred symmetrically to the other side using the
centerline as a frame of reference or a 'mirror plane'.
Using a pullsaw the shape is cut out in ten minutes. |
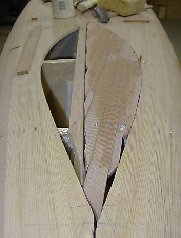 |
The
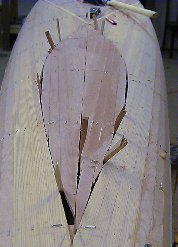
next step is to decide on the direction of the 'fill' strips, in this case 3/4" wide redwood.
Because of the relative flatness of the aft deck there was no need for bead and coving.
One half of the shape is filled so that it overlaps the centerline completely (see the reference
strip on the left). The strips are only roughly shaped by a utility knife so that the gap between
them and the deck is narrower than the 'insert' strip that is going to be set in later. In this
instance less than 3/8". |
 |
Ripping
the first half along the centerline preserves the frame of reference after the station alignment
lines disappear from view.
The other half is filled the same way. Here again, you can decide whether to mirror match the strips
on the centerline or do it the easier way and insert a centerline strip later on.
The small wedges sticking out of the joints press the strips together since there are few stations
to staple the strips to. Also, they keep the filler strips fair and even with the main body of the
deck until the glue sets. |


